A Practical Guide to Ground Anchoring for Construction Projects
Ground anchoring is used in a wide range of construction applications, from supporting excavations to stabilizing slopes and retaining structures. When properly designed and installed, anchoring systems help transfer loads into surrounding ground and contribute to the stability of the overall structure.
However, successful anchoring depends on more than selecting a product. Engineers must understand the site, define the required performance, specify compatible materials, and establish a controlled installation procedure.
This practical guide outlines the main considerations project teams should address when planning ground anchoring work.
Step 1: Understand the Ground Conditions
Before selecting an anchoring system, the project team should review the geotechnical information available for the site. Soil composition, rock quality, groundwater, and geological discontinuities may influence the choice of equipment and installation method.
For example, a borehole may remain stable in one type of ground but collapse or become difficult to maintain in another. Water-bearing layers may also require additional precautions.
Site investigations should be appropriate to the size and complexity of the project. Where information is limited, engineers should identify the uncertainty and decide whether further investigation is required before finalizing the design.
Step 2: Define the Purpose of the Anchor
Anchors can perform different functions depending on the project. They may help stabilize a slope, support a retaining wall, reinforce rock around an excavation, or resist forces acting on a structure.
The intended function determines the design requirements. Important factors include the expected load, anchor length, orientation, spacing, bond conditions, and required service life.
Temporary anchors and permanent anchors may have different performance and durability requirements. The design should specify the appropriate system rather than relying on a general product description.
Step 3: Select a Suitable Anchoring System
Common options include conventional grouted anchors, rock bolts, soil nails, and self-drilling systems. Each option has particular installation requirements and limitations.
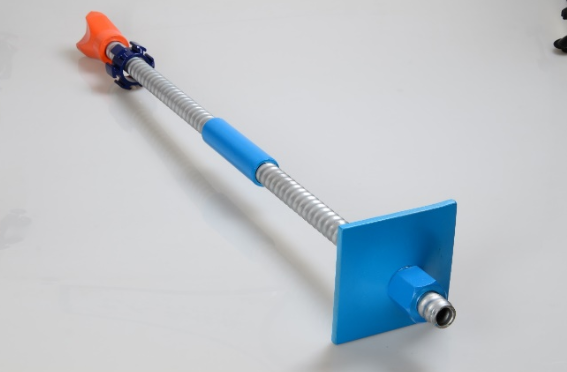
A self-drilling system may be useful when drilling and reinforcement need to be combined in challenging ground. In appropriate applications, the hollow drill bar remains in place after installation, while grout is introduced according to the system’s design.
A self drilling rock anchor is one option that project teams may investigate when comparing ground reinforcement methods. The final selection should be made by qualified professionals using site conditions, design loads, manufacturer specifications, and applicable standards.
The most appropriate system is not necessarily the most complex. It is the one that satisfies the project’s technical requirements and can be installed reliably under the actual site conditions.
Step 4: Check Materials and Equipment
Before work begins, the contractor should confirm that the supplied materials match the approved specifications. This includes the anchor components, couplers, drill bits, plates, nuts, grout, and other accessories required by the selected system.
Equipment should be suitable for the ground conditions and available working space. Operators should inspect machinery and confirm that it is maintained according to the manufacturer’s instructions.
Material documentation should be kept with the project records. Any proposed substitution should receive the necessary technical approval before installation.
Step 5: Prepare the Installation Area
A safe, organized work area helps reduce mistakes and delays. The team should confirm the anchor positions, working platform, equipment access, and relevant site restrictions.
Underground services and nearby structures should be identified before drilling. The installation method should also account for overhead obstructions, excavation stability, and the movement of heavy equipment.
Workers need clear instructions about their responsibilities and the sequence of operations. A pre-installation briefing can help identify hazards and clarify how unexpected ground conditions should be reported.
Step 6: Follow the Approved Installation Procedure
The exact procedure varies by system and project. Generally, installation involves positioning the equipment, drilling to the specified depth and orientation, installing the required components, and carrying out grouting or other specified operations.
For self-drilling systems, the drilling and grouting process should follow the manufacturer’s instructions and approved method statement. Operators should not change the procedure without authorization merely to increase production speed.
Important installation observations should be recorded. These may include drilling depth, angle, grout consumption, interruptions, and any unusual behavior encountered during the work.
Step 7: Verify Installation Quality
Quality control confirms whether the installed anchors meet the project requirements. Depending on the design, verification may include checks of material certificates, installation records, grout quality, and specified load tests.
The engineer should establish the testing requirements and acceptance criteria before installation starts. This avoids uncertainty about what constitutes acceptable work.
If a test or inspection identifies a problem, the project team should investigate the cause and determine the appropriate corrective action. Simply repeating the installation without understanding the issue may allow the underlying problem to continue.
Step 8: Consider Durability and Maintenance
Ground anchors may remain in service for many years. Their long-term performance depends on material selection, environmental exposure, corrosion protection, installation quality, and the design of the surrounding structure.
Groundwater chemistry and moisture conditions should be considered when selecting materials and protective measures. Permanent installations may require more extensive durability provisions than temporary support systems.
Project records should identify the installed system, locations, materials, test results, and any maintenance requirements. These records are valuable for future inspection and structural management.
See Also: How to Include Relevant Projects in a Job Application
Common Mistakes to Avoid
Several problems can be reduced through careful planning:
- Selecting a system without sufficient geotechnical information.
- Using materials that do not match the approved design.
- Ignoring unexpected drilling or grouting behavior.
- Changing installation procedures without technical approval.
- Failing to document installation details.
- Treating quality checks as an optional final step.
Addressing these issues early improves consistency and makes construction decisions easier to justify.
Conclusion
Ground anchoring is most effective when each stage, from investigation and system selection to installation and verification, follows a clear engineering plan.
By understanding the ground conditions, using compatible materials, following approved procedures, and maintaining accurate records, construction teams can improve reliability and manage ground-related risks more effectively.